 US Dollar
 Euro
Euro
 Australian Dollar
 Canadian Dollar
 Polish Zloty
 British Pound

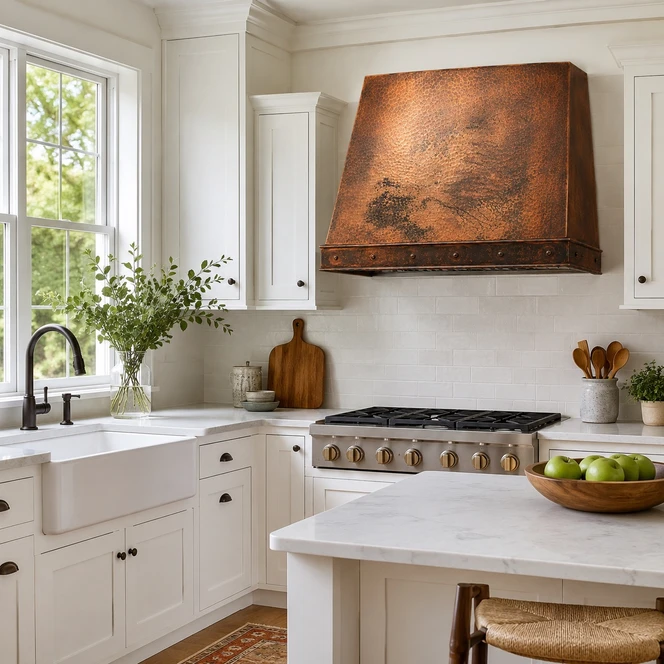
Sloped Under-Cabinet Hammered Copper Range Hood with Rivets Guide explains how a compact handcrafted copper hood can add warmth, texture, and artisan detail below upper cabinetry. This sloped under-cabinet copper range hood with rivets features a low-profile body, hand-hammered copper surface, riveted front band, compact under-cabinet proportions, and custom ventilation preparation for kitchens where a full wall-mounted chimney hood is not practical. Its warm copper patina and forged rivet detail work well in rustic, farmhouse, transitional, industrial, and compact custom kitchens. Because each hood is handmade, natural patina movement, hammering variation, rivet placement character, seam marks, forming details, and small artisan irregularities should be expected. No two pieces are identical. Explore completed interiors showcasing this compact handcrafted design in our sloped hammered copper under-cabinet hood kitchen images.
Blog Summary
- Material: Hand-hammered copper
- Mounting: Under-cabinet design
- Shape: Compact sloped body
- Detail: Riveted front band
- Finish: Six copper patinas
- Planning: Custom insert-ready hood
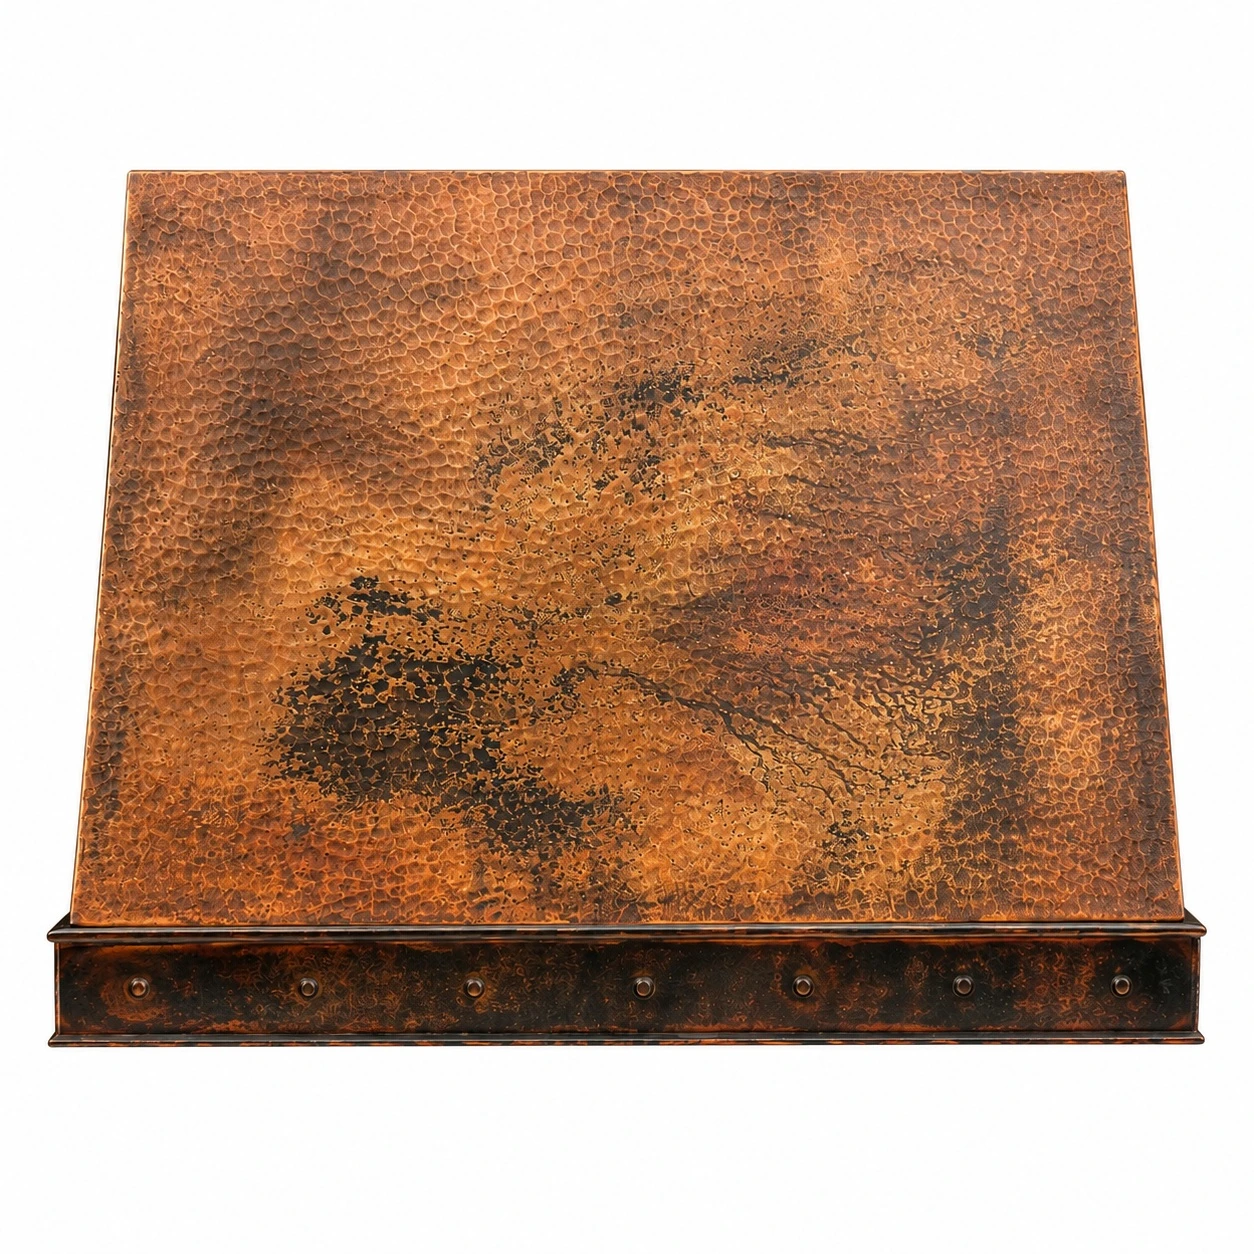
Planning an Under-Cabinet Copper Hood
An under-cabinet copper hood should be planned around cabinet height, cooktop width, wall clearance, insert dimensions, duct routing, and the desired visual impact below upper cabinetry. Unlike a tall wall-mounted hood, this style is compact and horizontal, making it useful in kitchens where storage cabinets remain above the range. The hammered copper surface adds warmth and handmade character, while the riveted band gives the front edge a more finished architectural detail. Buyers comparing related designs can review the broader copper range hoods collection for taller wall-mounted, island, and decorative hood options.
Why Choose an Under-Cabinet Hood?
An under-cabinet hood is useful when the kitchen layout does not allow a full chimney-style range hood. It fits below existing or planned cabinetry and keeps the upper wall available for storage. This makes it practical for apartments, smaller kitchens, secondary kitchens, pantry kitchens, compact remodels, and traditional cabinet runs. A handcrafted copper version adds more character than a standard stainless unit because the hood becomes a visible design feature instead of a purely functional appliance cover.
Custom Hood Specifications
- Material: Handcrafted copper
- Texture: Hand-hammered surface
- Shape: Sloped under-cabinet body
- Detail: Riveted front band
- Mounting: Under-cabinet planning
- Finish: Copper patina options
- Width: Custom kitchen sizing
- Height: Compact cabinet fit
- Depth: Under-cabinet projection
- Insert: Custom insert preparation
Compact Sloped Design
The compact sloped body gives this hood its practical and visual identity. The front face angles back toward the upper cabinet area, creating a cleaner profile than a flat box hood. This slope helps the hood feel lighter while still giving the front edge enough presence to show the copper finish and rivet band. The shape is especially useful in kitchens where cabinet storage is important and the hood must fit neatly below the upper cabinet line.
Hammered Copper Texture
The hand-hammered copper surface creates movement across the hood without adding heavy ornament. Hammering catches light from windows, pendants, under-cabinet lighting, and nearby surfaces. It also helps small signs of use blend into the finish over time. Because the hood is made by hand, the hammering will not look machine-perfect or completely uniform. That variation is part of the character of handcrafted copper and helps the compact hood feel more substantial.
Riveted Front Band
The riveted band gives the front edge a stronger handcrafted detail. It frames the hood visually, adds shadow and rhythm, and connects the design to traditional metalwork. In a compact under-cabinet format, this detail is especially important because there is less vertical surface area than on a full wall-mounted hood. The rivets help the hood feel intentional rather than plain, while still keeping the overall shape simple enough for everyday kitchens.
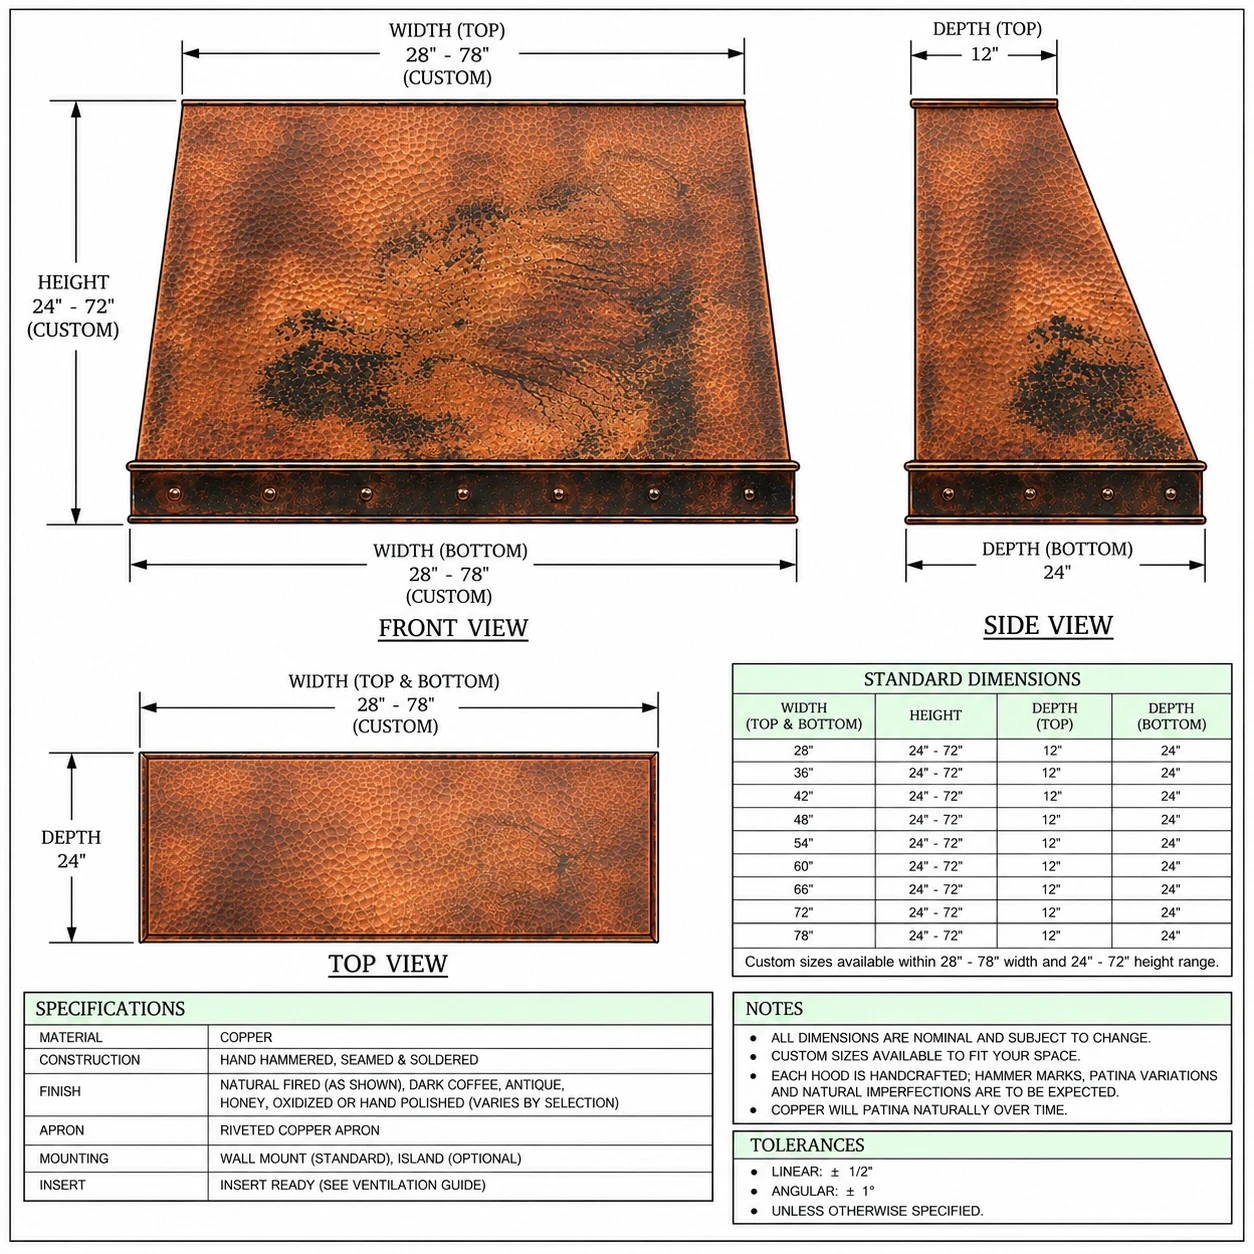
Copper Hood Dimensions
The technical drawing helps confirm the hood’s front width, compact height, side slope, depth, band placement, and underside opening. Under-cabinet dimensions must be reviewed carefully because the hood needs to fit between side cabinets, below upper cabinetry, above the cooking surface, and around the chosen insert. Even small changes in height or depth can affect cabinet doors, backsplash tile, wall outlets, duct position, lighting, and filter access.
Width and Cabinet Fit
Width should be selected around both the cooking appliance and the cabinet opening. A hood that is too narrow may look undersized above the range, while a hood that is too wide may not fit cleanly between cabinets. Many kitchens use a hood width that matches or slightly exceeds the cooktop when space allows. For an under-cabinet hood, confirm cabinet interior width, finished side panels, door swing, trim, backsplash thickness, and any side clearance before ordering.
Height and Clearance
Under-cabinet hood height is more restricted than wall-mounted hood height because the upper cabinet usually controls the available space. The hood must allow safe cooking clearance while still leaving enough room for the insert, filter access, wiring, and duct transition. Installation height should follow the cooking appliance and insert manufacturer’s instructions. Before production, confirm the distance from the cooktop to the cabinet bottom and make sure the hood will not sit too low for comfortable cooking.
Depth and Projection
Depth affects both capture and comfort. A deeper hood may provide better coverage over the cooking surface, but it can also project farther into the working area. A shallower hood may feel less intrusive, but it must still coordinate with the selected insert and appliance. The sloped profile helps soften the projection visually. Measure cabinet depth, cooktop depth, backsplash thickness, and the user’s cooking space before selecting final dimensions.
Insert and Ventilation Planning
This copper hood is a custom metal enclosure that can be prepared for ventilation equipment. Rustica House can supply a 200 CFM insert only. Other internal inserts, liners, blowers, filters, lights, controls, and recirculating systems must be buyer-supplied with complete specifications before fabrication. Buyer-supplied internal inserts up to 1,260 CFM and external blowers up to 1,500 CFM may be supported when full technical details are provided before production. Final compatibility depends on hood dimensions, insert size, duct routing, mounting method, cabinet construction, and local installation requirements.
CFM and Insert Fit
CFM needs depend on the cooking appliance, range output, cooking habits, duct length, duct diameter, number of elbows, blower type, and local code. With an under-cabinet hood, insert fit is especially important because there is limited height inside the hood body. The insert must allow filter removal, control access, lighting placement, mounting, and service access. For broader technical planning, review the range hood insert guide before finalizing the hood dimensions.
Duct Routing
Duct routing should be confirmed before fabrication because the under-cabinet layout may limit available space. Some kitchens vent vertically through the upper cabinet and ceiling. Others vent horizontally through the wall. Recirculating systems may also be considered when ducting is not practical, but the buyer must provide the complete insert and filter specifications before production. The duct path should be reviewed with the installer so the hood, cabinet, insert, and wall conditions work together.
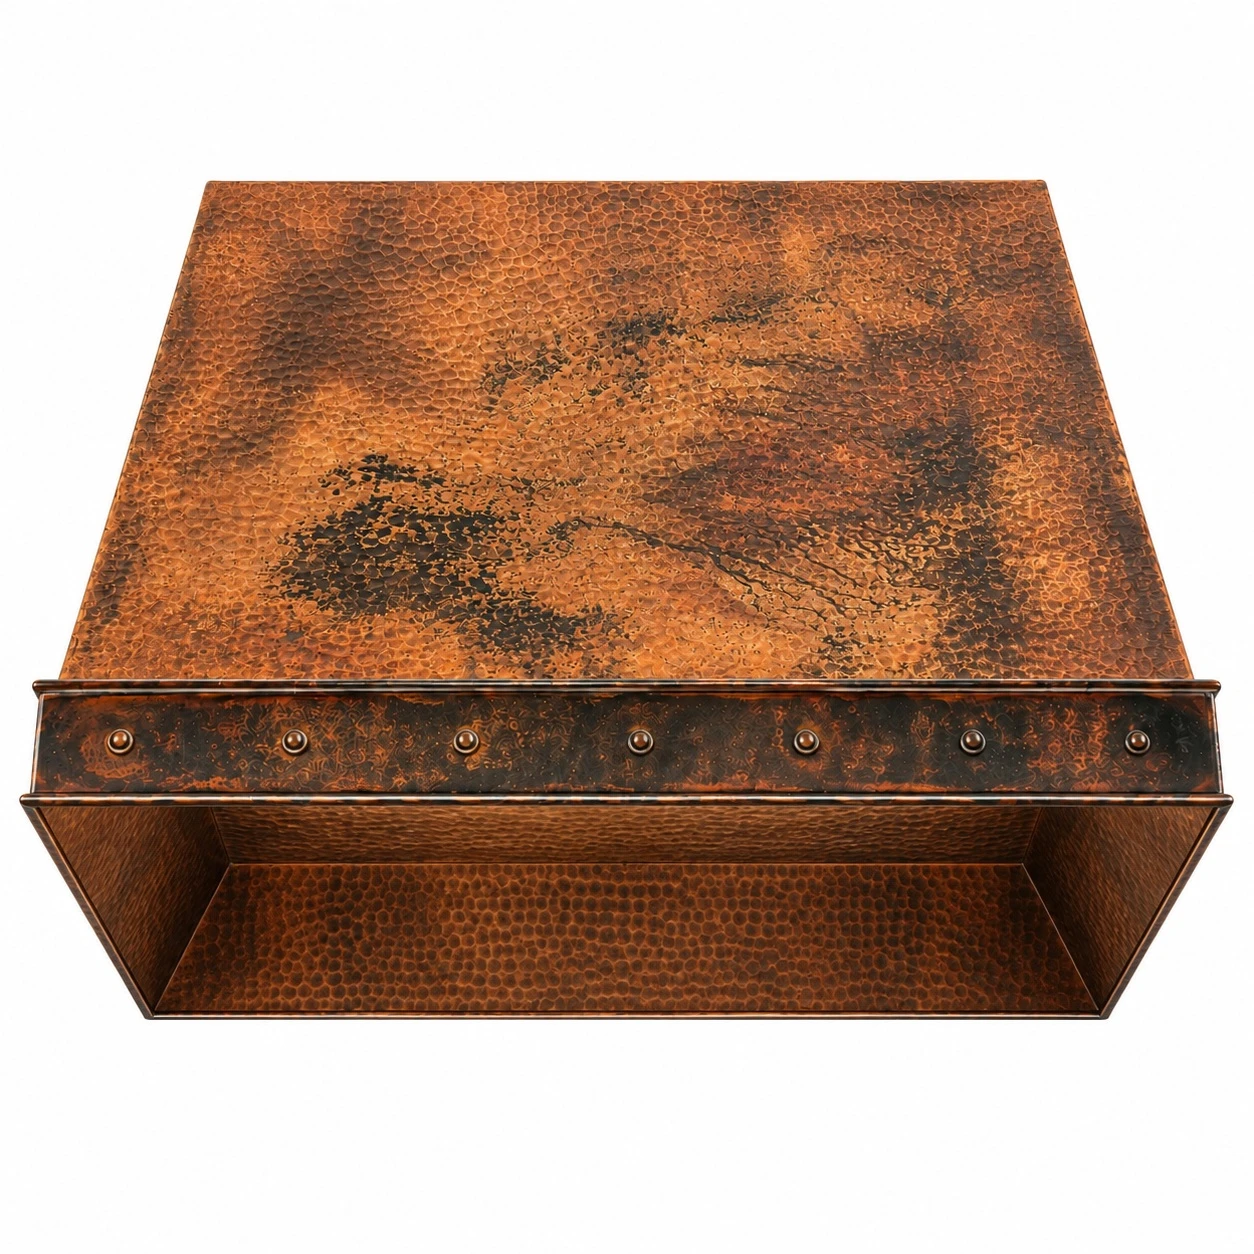
Underside Preparation
The underside view shows the importance of planning the insert opening, lower rim, mounting support, filter access, and control location. The underside must be practical because filters need to be removed, cleaned, and serviced over time. If a buyer-supplied insert is used, provide the brand, model, cutout size, mounting instructions, duct direction, controls, lights, filters, and clearance requirements before fabrication. The goal is to preserve the handmade exterior while supporting everyday kitchen function.
Copper Finish Options
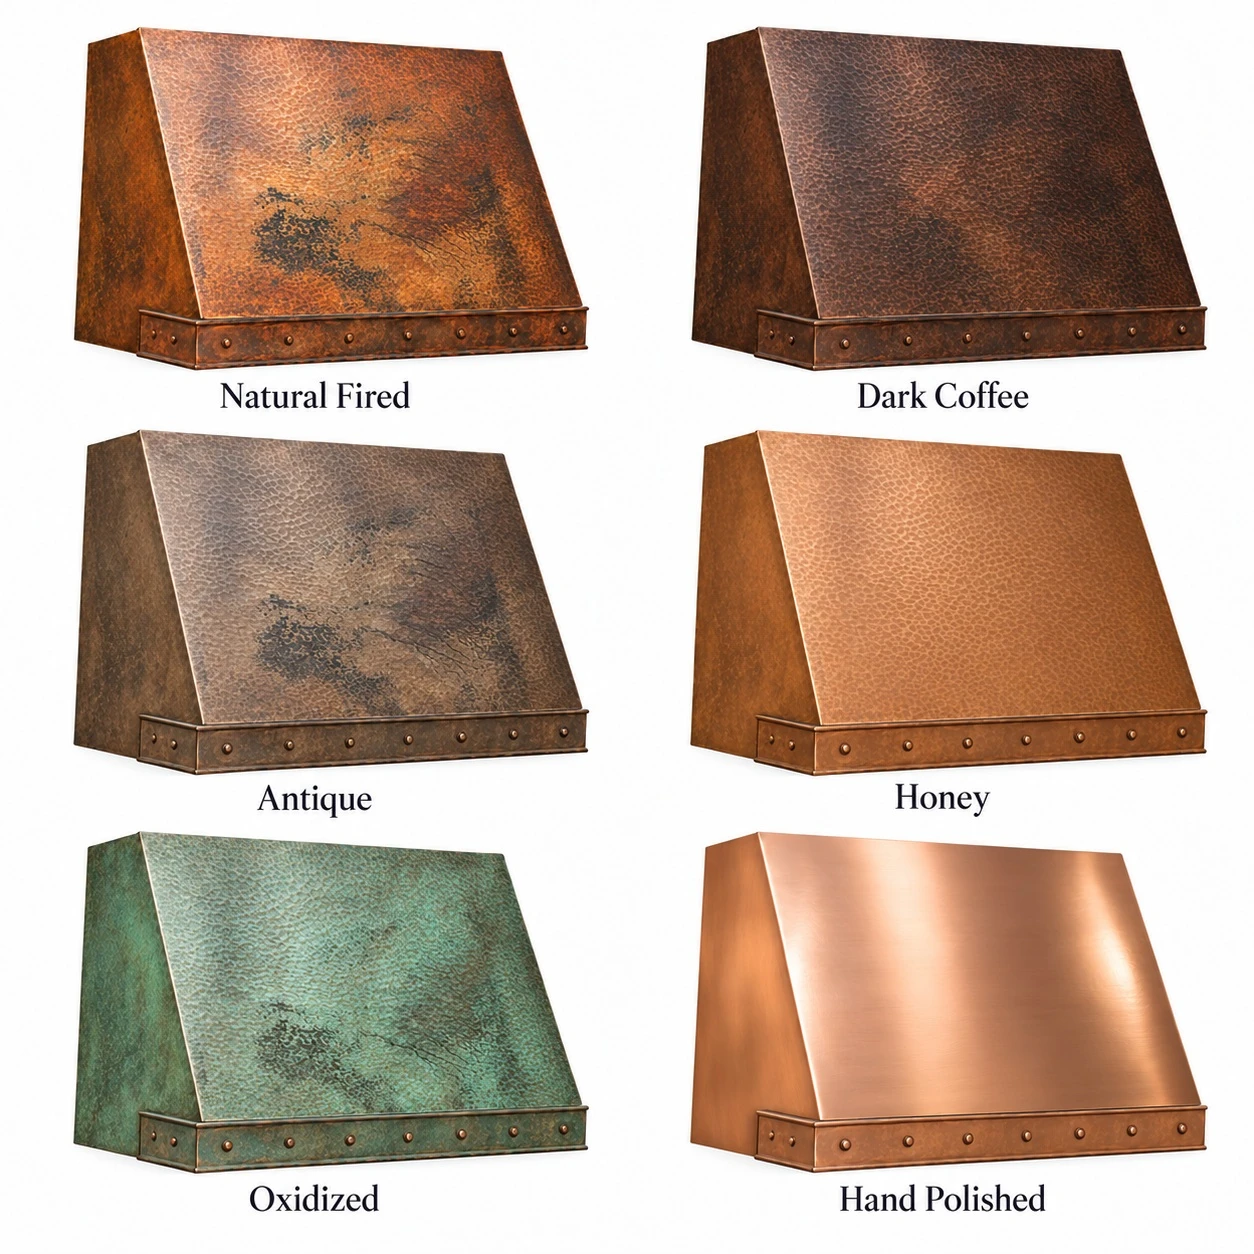
Copper finish selection changes how the hood feels in the kitchen. Natural Fired creates lively copper movement with warm brown, bronze, and reddish variation. Dark Coffee gives the compact hood a deeper rustic character. Antique creates a more aged and subdued appearance. Honey offers a softer warm tone. Oxidized adds green patina character for stronger visual contrast. Hand-Polished creates a brighter copper effect. Because each finish is handmade, final color may vary from images and samples.
Backsplash Planning
The backsplash should support the copper hood without making the cooking wall feel crowded. Handmade tile, plaster, brick, stone slab, limestone, travertine, zellige, and simple ceramic tile can all work depending on the kitchen style. Since the hood is compact, the backsplash may occupy more visual area than it would behind a tall chimney hood. A balanced backsplash helps the copper band, rivets, and hammered texture remain visible without competing against strong pattern or excessive grout lines.
Cabinet Coordination
Cabinetry is central to this hood because the product mounts below or within the cabinet layout. Painted cabinets can make the copper stand out clearly, while natural wood cabinets can create a warmer rustic effect. White oak, walnut, alder, cream paint, sage green, dark blue, and warm white can all coordinate with copper. Hardware should be selected with the hood in mind. Black iron, bronze, aged brass, and warm mixed metals can all support the riveted copper detail.
Rustic Kitchens
Rustic kitchens are a natural setting for this hood because hammered copper works well with reclaimed wood, stone, plaster, textured tile, iron hardware, and warm lighting. The compact under-cabinet shape keeps the kitchen practical, while the copper surface adds artisan depth. Dark Coffee or Antique copper can strengthen the rustic effect, while Natural Fired can add more color movement above the range.
Modern Farmhouse Kitchens
Modern farmhouse kitchens can pair this hood with painted cabinetry, pale oak, handmade tile, apron-front sinks, stone counters, and simple hardware. The sloped body keeps the design cleaner than a highly decorative hood, while the riveted band adds handcrafted detail. Honey or Natural Fired copper can brighten the space, while darker patinas can add more contrast against white or cream cabinets.
Industrial Kitchens
Industrial kitchens can use this hood with brick, steel, concrete, black fixtures, open shelving, and darker cabinet finishes. The riveted band connects naturally with metal hardware and exposed structural details. Copper softens industrial materials, preventing the room from feeling too cold. A Hand-Polished finish can add stronger reflection, while Dark Coffee or Antique copper can feel more rugged and grounded.
Transitional Kitchens
Transitional kitchens can use this under-cabinet hood when the surrounding design remains balanced. Shaker cabinetry, quiet stone, restrained hardware, simple tile, and warm wood floors help the copper stand out without overwhelming the room. The compact sloped profile works well in kitchens where full-height hood architecture would feel too heavy. A smoother surrounding palette lets the hammered copper texture become the main decorative element.
Other Compatible Kitchen Styles
- Country kitchens
- Spanish Colonial kitchens
- Compact cottage kitchens
- Urban loft kitchens
Coppersmith Perspective
A compact under-cabinet copper hood requires careful metalwork because the body is smaller and every detail is easy to notice. The sloped face must be formed cleanly, the lower edge should align with the cabinet run, the rivets need a steady rhythm, and the hammered surface must add texture without overwhelming the compact profile. Handmade copper will show subtle variation in tone, shaping, and surface character. For more background on artisan work, read the Rustica House copper craftsmanship guide.
Copper Care and Maintenance
Copper should be cleaned gently with mild soap, warm water, and a soft cloth when needed. Dry the surface after cleaning to reduce water spots and residue. Avoid abrasive pads, steel wool, bleach, ammonia, acidic cleaners, harsh degreasers, and aggressive polishing compounds because they can scratch the metal or disturb the patina. Grease should be wiped before it builds up around rivets, seams, underside edges, and hammered low points. For more detailed maintenance, review the copper hood care guide.
Patina Expectations
Copper can change naturally with heat, humidity, touch, air exposure, cooking residue, and cleaning habits. Raised hammered areas may catch brighter highlights, while recessed areas may appear deeper. Rivets and edges can also collect subtle tonal contrast over time. This natural movement is part of copper’s appeal. Buyers who want a more controlled appearance should discuss finish care before ordering. Handmade copper should not be expected to look like a flat painted or machine-perfect surface.
Measurements Before Ordering
Before ordering, confirm cooktop width, cabinet opening, cabinet depth, cabinet bottom height, hood width, hood height, hood depth, installation clearance, backsplash thickness, duct route, insert dimensions, blower type, electrical needs, mounting conditions, and local code requirements. Photos of the cooking wall can help determine whether the hood should be wider, deeper, or more restrained. If a buyer-supplied insert will be used, provide complete specifications before fabrication so the underside opening and internal preparation can be planned correctly.
Common Questions
What makes this copper hood distinctive?
The compact under-cabinet body, sloped front profile, hand-hammered copper surface, and riveted band create its handcrafted character.
What kitchen styles fit this hood?
It works well in rustic, modern farmhouse, industrial, transitional, country, Spanish Colonial, compact cottage, and urban loft kitchens.
Can this hood be custom sized?
Yes. Width, height, depth, finish, texture, rivet details, and insert opening can be planned before production.
Does the hood include ventilation?
Rustica House can supply a 200 CFM insert only. Other inserts, blowers, and ventilation systems must be buyer-supplied.
What blower support is possible?
Buyer-supplied internal inserts up to 1,260 CFM and external blowers up to 1,500 CFM may be supported with full specifications.
Is this hood for upper cabinets?
Yes. It is designed for under-cabinet planning where the hood fits below upper cabinetry above the cooking surface.
What finish options are shown?
The hood is shown in six copper finish options, including Natural Fired, Dark Coffee, Antique, Honey, Oxidized, and Hand-Polished.
Will the copper patina change?
Yes. Copper can change with heat, humidity, handling, cooking residue, cleaning habits, light, and time.
How do you clean this hood?
Use mild soap, warm water, and a soft cloth. Avoid abrasives, bleach, ammonia, acidic cleaners, harsh degreasers, and steel wool.
Why provide insert specifications early?
The insert opening, mounting support, filter access, lighting placement, controls, and duct route must be planned before fabrication.
Final Design Guidance
Sloped Under-Cabinet Hammered Copper Range Hood with Rivets Guide shows how compact under-cabinet planning, hammered copper texture, a sloped body, riveted front band, six patina options, insert preparation, and kitchen material coordination work together. Choose this hood when the kitchen needs handcrafted copper character without a full chimney-style hood. Confirm cabinet opening, cooktop width, cabinet depth, installation clearance, hood projection, duct route, insert specifications, blower plan, and backsplash material before ordering. Explore the under-cabinet copper hood, compare copper range hoods, and review the range hood insert guide before finalizing your kitchen plan.