 US Dollar
 Euro
Euro
 Australian Dollar
 Canadian Dollar
 Polish Zloty
 British Pound

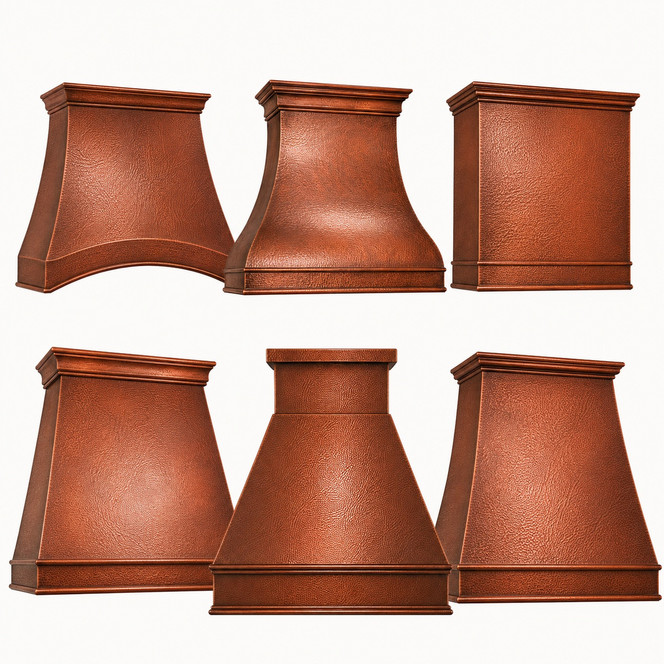
Copper Range Hood Installation Guide explains how homeowners can plan the safe installation of a handcrafted copper kitchen hood. A custom hood is both a ventilation cover and a heavy architectural feature, so measurements, framing, duct routing, electrical access, and insert planning should be reviewed before installation begins. This guide is written for homeowners who want to understand the process, but local codes, structural conditions, and wiring requirements may still require a licensed contractor, electrician, or HVAC technician. Explore handcrafted copper range hoods to compare hood styles, sizes, finishes, and installation options before planning your project.
Blog Summary
- Planning: Measure before installing
- Support: Use studs or joists
- Insert: Confirm hood fit early
- Safety: Follow local codes
- Care: Clean copper gently
Installation Overview
A copper range hood installation should begin with planning, not tools. Before the hood arrives, confirm whether the kitchen requires a wall-mounted or island-mounted configuration. Wall hoods must be secured to wall framing, while island hoods require ceiling support. Because handcrafted copper hoods can be large and heavy, the surrounding structure must be able to hold the hood safely. The duct route, outlet location, mounting height, and ventilation insert should also be confirmed early. If any part of the project involves structural changes, hardwiring, masonry drilling, or unfamiliar ductwork, hire a qualified professional before beginning.
Safety Comes First
Installing a metal kitchen hood is not a casual do-it-yourself task. Local building codes may require a licensed electrician, HVAC technician, or contractor, especially when electrical wiring, exterior venting, roof penetrations, or structural reinforcement are involved. Homeowners should check municipal requirements before removing an old hood or drilling into walls and ceilings. A professional can confirm that the mounting surface is strong enough, the duct route is safe, and the electrical connection meets code. Even when a homeowner handles basic preparation, final installation should always prioritize safety, proper support, and legal compliance.
Safety Checklist
- Codes: Check local rules
- Power: Confirm electrical access
- Support: Locate framing
- Duct: Plan the vent route
- Help: Use two installers
Planning the Hood Type
The first installation decision is whether the hood will be wall-mounted or island-mounted. A wall-mounted hood sits above a range placed against a wall and is usually secured to studs or structural backing. An island-mounted hood hangs above a cooktop located in an island and must be supported from ceiling joists or reinforced framing. Each layout affects duct routing, visibility, weight distribution, and installation difficulty. Wall hoods are usually simpler to anchor, while island hoods must look balanced from several angles. Confirm the mounting style before ordering so the hood can be prepared correctly.
Choosing the Hood
When choosing a copper hood, consider more than appearance. The hood should be sized to the range, the room, and the ventilation insert. Copper thickness, internal frame construction, finish, shape, and installation style all matter. Rustica House copper hoods are handcrafted as decorative and functional metal shells designed for real kitchen use. The internal structure helps the hood mount securely when installed into proper framing. To learn more about handmade construction, review the copper hood production guide before selecting a custom model.
Ventilation Planning
The hood cover gives the kitchen its handcrafted copper appearance, but the insert performs the ventilation work. Rustica House can supply a 200 CFM insert only. If the buyer wants a different insert, blower, or higher-output ventilation system, that insert must be supplied by the buyer. Rustica House can prepare the hood for a buyer-supplied insert when the insert details are provided before production. This preparation requires accurate make, model, dimensions, cutout requirements, duct size, controls, and lighting details. Confirming insert compatibility early helps avoid installation delays and fit problems.
Insert Details
- Rustica: 200 CFM insert only
- Buyer: Supplies other inserts
- Model: Provide exact details
- Cutout: Confirm dimensions
- Duct: Match vent needs
Before Installation
Before unboxing the hood, prepare the work area and review all measurements. Confirm the range centerline, hood width, mounting height, ceiling height, duct location, and outlet placement. Locate studs for wall-mounted hoods or joists for island hoods. Make sure the mounting surface is strong enough to carry the hood’s weight. Gather tools such as a stud finder, drill, level, tape measure, pencil, heavy-duty screws, lag bolts, protective gloves, and a second person to help lift. Keep the hood protected during handling so the copper finish is not scratched.
Preparation Checklist
- Centerline: Mark the range area
- Height: Confirm hood clearance
- Studs: Locate wall framing
- Joists: Check ceiling support
- Tools: Prepare before lifting
Step One: Remove Insert
If the ventilation insert is already installed inside the hood for shipping or test fitting, remove it before mounting the hood shell. Locate the screws or brackets holding the insert in place and carefully set the insert aside in a protected area. Removing the insert reduces weight and gives installers better access to the hood’s internal frame. It also helps prevent damage to filters, lights, wiring, and controls during lifting. Keep all screws, brackets, and parts organized so the insert can be reinstalled correctly after the hood body is secured.
Step Two: Locate Support
For a wall-mounted hood, use a stud finder to locate wall studs behind the installation area. Mark each stud clearly and confirm that the hood can be anchored into solid framing. For an island hood, locate ceiling joists or structural support above the cooktop. If the desired mounting points do not align with studs or joists, install blocking or reinforcement before mounting. Masonry, brick, or concrete walls may require special anchors and drilling tools. Do not mount a heavy copper hood only into drywall. The hood must be attached to structural material capable of supporting its weight.
Step Three: Mark Holes
After locating the structural support, position the hood carefully and mark the mounting points. Use a level to confirm the hood sits straight from side to side and front to back. Mark holes through the internal frame where the hood will connect to studs, blocking, masonry, or joists. A minimum of four secure attachment points is recommended, but larger hoods may require additional fastening. Measure twice before drilling, because small errors can affect alignment, backsplash spacing, cabinet clearance, and the final appearance of the range wall. Keep the hood protected while marking and drilling.
Mounting Points
- Level: Check every direction
- Frame: Drill through structure
- Anchors: Use proper hardware
- Spacing: Balance all points
- Size: Add support if large
Step Four: Mount Hood
Lift the hood into position with at least two people. Copper hoods can be heavy and awkward to hold, especially in larger sizes or island configurations. Align the hood with the marked centerline and mounting points. Fasten it into the structural framing using heavy-duty screws, lag bolts, or appropriate masonry anchors. Tighten the fasteners securely, but avoid damaging the hood body or internal frame. Continue checking the level as the hood is secured. Once mounted, gently test that the hood feels stable before moving on to duct and insert work.
Step Five: Connect Ducting
Connect the ductwork according to the selected ventilation system and local code requirements. Ducting may route through the wall, ceiling, attic, roof, or exterior wall depending on the kitchen layout. Use the correct duct size for the insert and keep the route as direct as possible. Seal duct joints with appropriate foil tape to reduce leaks. Avoid crushed, undersized, or poorly routed ductwork because it can reduce airflow and increase noise. If the system requires hardwiring, roof work, exterior wall cutting, or complex HVAC planning, this step should be completed by a qualified professional.
Step Six: Reinstall Insert
After the hood shell is mounted and ducting is ready, reinstall the ventilation insert. Align the insert with the internal brackets or prepared cutout, then fasten it using the original screws or approved hardware. Reconnect the duct and power according to the insert manufacturer’s instructions. Test the fan, lights, controls, and filter access before the installation area is closed. Make sure the filters can be removed for cleaning and that no wiring or ducting interferes with operation. If anything rattles, shifts, or feels loose, stop and correct the issue before using the hood for cooking.
Testing Checklist
- Fan: Test every speed
- Lights: Confirm operation
- Filters: Check easy access
- Duct: Listen for leaks
- Frame: Confirm stability
Wall-Mount Notes
Wall-mounted copper hoods are usually installed above a range or cooktop against a backsplash wall. The hood should align with the center of the cooking appliance and relate visually to cabinets, shelves, tile, and ceiling height. If upper cabinets flank the hood, confirm side clearance before installation. The backsplash may need to be installed before or after the hood depending on the material and design. A wall-mounted hood should feel integrated with the cooking wall, not floating too high or crowding the range. Careful layout before drilling prevents costly adjustments later.
Island-Mount Notes
Island copper hoods require additional planning because they are visible from multiple sides. The ceiling support must be strong enough to carry the hood, and the duct route often travels through the ceiling or roof. Since island hoods hang in open space, they should align with the island, cooktop, lighting, and room sightlines. The hood should be large enough to capture cooking fumes but not so large that it blocks views across the kitchen. Professional installation is strongly recommended for island hoods because ceiling structure, duct routing, and lifting are more complex.
Electrical Requirements
Most ventilation inserts require properly located electrical access. A standard outlet may be sufficient for some insert systems, while other systems may require hardwiring. Electrical work should follow local code and the insert manufacturer’s instructions. The outlet or junction box should be placed where it is accessible and hidden safely within the installation area. Do not run cords loosely across hot surfaces, sharp edges, or exposed areas. If electrical access is not already installed behind or above the hood location, hire a licensed electrician before mounting the hood.
Electrical Checks
- Outlet: Confirm location
- Power: Match insert specs
- Code: Follow local rules
- Access: Keep service reachable
- Pro: Hire for hardwiring
Maintenance After Install
Once the hood is installed, gentle maintenance will protect both performance and appearance. Use a soft cloth with mild soap and warm water to clean the copper surface. Avoid abrasive pads, steel wool, bleach, ammonia, harsh degreasers, and acidic cleaners. These can scratch the metal or disturb the patina. If the hood has a hand-hammered copper surface, wipe carefully so grease does not collect in low points. Dry the hood after cleaning to reduce water spots and preserve the finish.
Filter Care
Filters should be cleaned regularly to maintain airflow and reduce strain on the ventilation system. Mesh or baffle filters can often be removed and washed with warm soapy water, but always follow the insert manufacturer’s instructions. Allow filters to dry completely before reinstalling them. Grease buildup can reduce performance, create odor, and make the hood harder to clean. A homeowner who cooks frequently may need to clean filters more often than someone who cooks lightly. Keep filter access clear when designing surrounding cabinets, shelves, or decorative trim.
Common Installation Questions
Can I install a copper range hood myself?
A homeowner may be able to complete some preparation steps, but professional installation is often recommended. Copper hoods can be heavy, and installation may involve structural support, duct routing, electrical work, and local code requirements. If the project includes hardwiring, ceiling mounting, masonry drilling, roof venting, or reinforcement, hire a licensed contractor, electrician, or HVAC technician. Safety and compliance should always come before convenience.
What if there are no studs where I need them?
If the wall studs do not align with the desired hood placement, structural blocking can be installed between studs to create secure mounting points. Do not attach a heavy copper hood only to drywall. Island hoods may require ceiling reinforcement if joists do not align with the hood frame. A contractor can help determine the safest way to add framing support before installation begins.
Does Rustica House supply ventilation inserts?
Rustica House can supply a 200 CFM insert only. Any other insert, blower, or ventilation system must be supplied by the buyer. When the buyer provides the insert make, model, dimensions, cutout information, and installation details before production, Rustica House can prepare the hood shell for that buyer-supplied insert. This helps the hood fit the chosen ventilation system more accurately.
Can copper hoods be made in custom sizes?
Yes. Copper hoods can be made to fit specific widths, heights, depths, mounting styles, and design requirements. Custom sizing is important because the hood must relate to the range, ceiling height, cabinet layout, duct route, and insert dimensions. Confirm all measurements before production so the hood is built for the actual kitchen instead of a generic opening.
How should I choose blower power?
Blower power depends on the appliance, cooking habits, duct route, kitchen size, and local ventilation requirements. Light everyday cooking may need less airflow than high-output burners, frequent frying, grilling, or heavy smoke. If a stronger system is needed, the buyer should select and provide the insert or blower details. A qualified HVAC professional can help determine the correct airflow for the home.
Design Planning Tips
Installation planning should also consider the final kitchen design. The hood should align with the range, backsplash, cabinets, ceiling height, and lighting. A hood that is too small may look weak above a large range, while an oversized hood may crowd the room. Copper finish and patina should coordinate with cabinet color, hardware, tile, counters, and flooring. If you are still comparing shapes and finishes, review the copper hood selection guide before finalizing the installation plan.
Installation Summary
A copper range hood installation requires careful preparation, proper structural support, insert compatibility, safe electrical access, and accurate duct planning. The hood should be mounted into studs, joists, blocking, masonry, or another approved structural surface. Insert details should be confirmed before production, especially when the buyer supplies a ventilation system other than Rustica House’s 200 CFM insert. A successful installation blends function and design: the hood should remove smoke and odors, fit the kitchen architecture, and remain secure for long-term use. Professional help is recommended whenever safety, code, or structural uncertainty exists.
Final Installation Guidance
Copper Range Hood Installation Guide is intended to help homeowners understand the process before mounting a handcrafted hood. Use it to plan measurements, framing, duct route, electrical access, insert fit, and basic maintenance. Do not begin installation until safety requirements and local codes are understood. Heavy hoods, island layouts, hardwiring, roof venting, and structural reinforcement should be handled by qualified professionals. With the right planning and support, a Rustica House copper hood can become a secure, functional, and beautiful focal point above the cooking area.